![]()
|
|
|
|
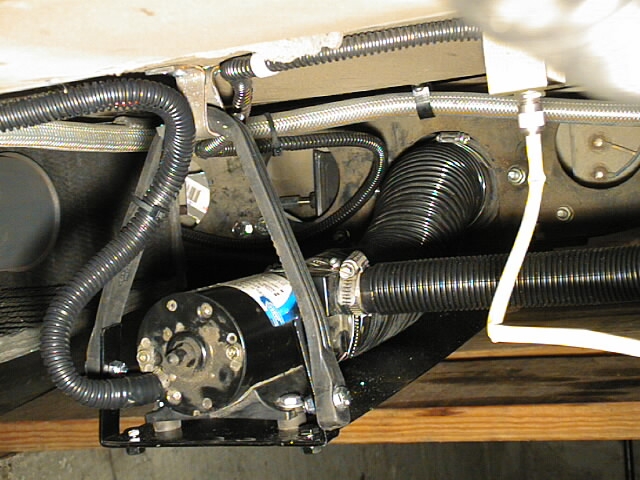
Installing the Macerator Pump ended up as a by-product of wanting a hitch and having to finally fix a gate valve that was patched with goop 10 years or so ago. I'm not sure that my installation will be effective in real use. Not sure if it'll empty the holding tank completely. If not there'll be some redesign after the first trip.
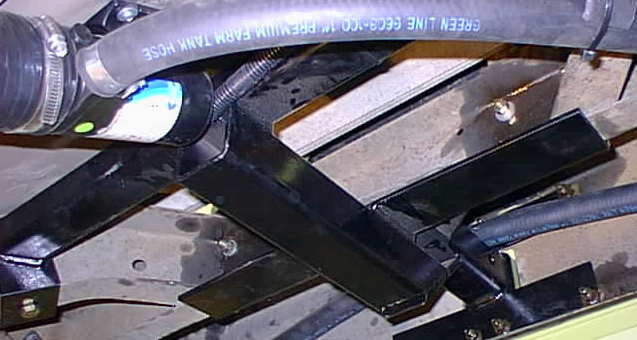
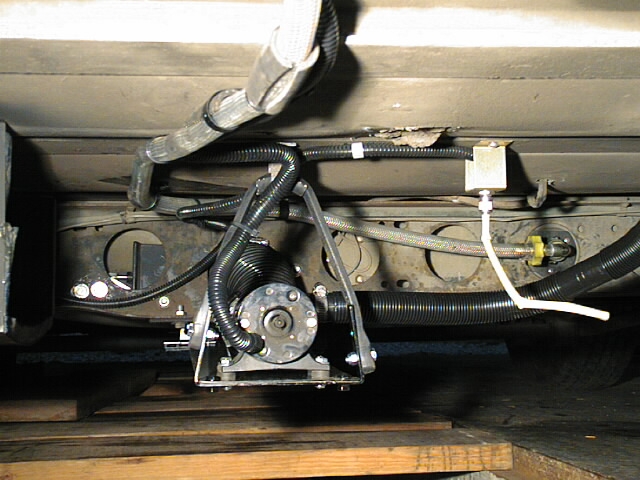
The above is a rearward view. The Macerator pump is mounted on the rise.
The outlet is strapped to the underside of the rear frame with a twist-on coupling.
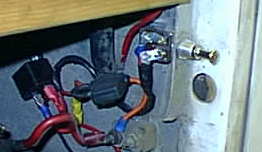
Three 7 foot sections of 1" hose are stored inside the bumper. The switch (a simple push/pull) for the pump is installed in the battery/generator compartment in such a way that closing the door switches it off. This safeguards agains turning the pump on accidentally.
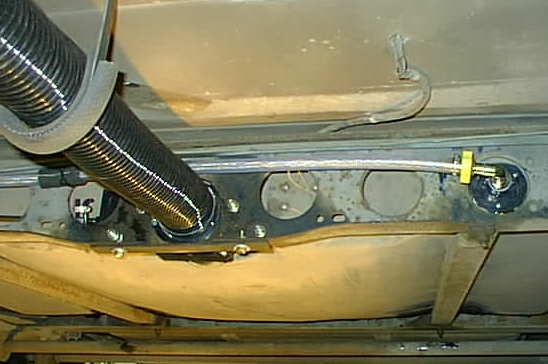
The green connector seen above by the pump outlet is the flush-out connection:
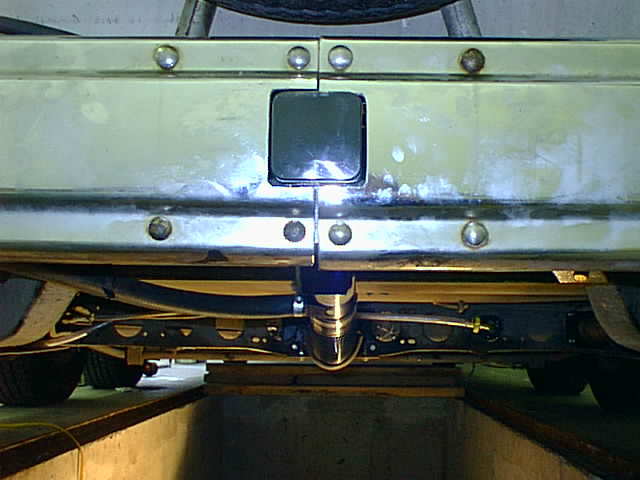
Hitch and Macerator Pump:
The Hitch went in smoothly and looks good, I.e. it can hardly be seen when not in use.
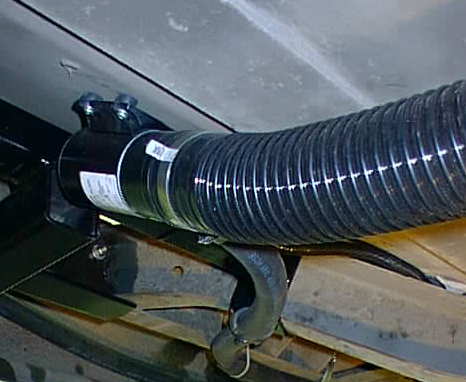
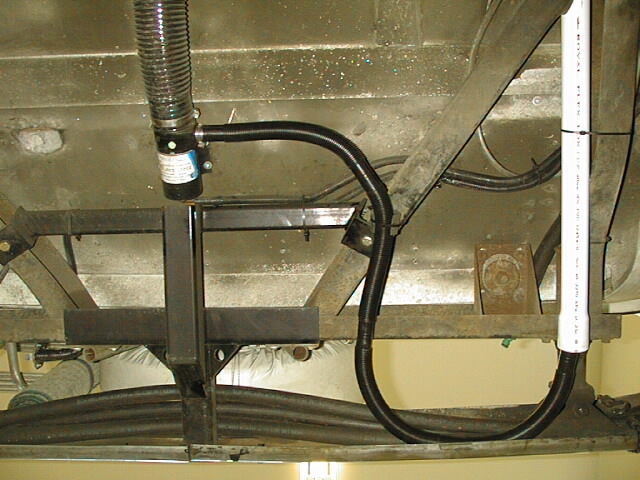
February 22, 1999 update:I didn't like the arrangement of storing the outlet hoses inside the rear bumper. I also noticed on the last few trips that I only used one length of hose except for once and even then I could have. While reasonably convenient the rubber hose was bulky and a little bit of a hassle to thread back into the bumper each time. The new setup: A ten foot piece of 1 1/4" PVC pipe mounted on the left underside of the coach as storage for a 10 foot section of 1 inch bilge pump hose obtained at a marine store. One end is permanently connected to the pump and the other end simply stored in the PVC until needed. The pipe threaded through a cutout in the rear part of the frame and above the rear stabilizers right close to the left rail. I used a heatgun to mold the pipe a little for a better fit.
Should make the necessary task of emptying clean and easy.
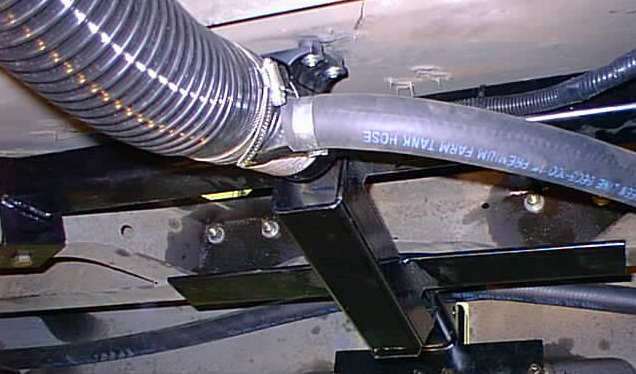
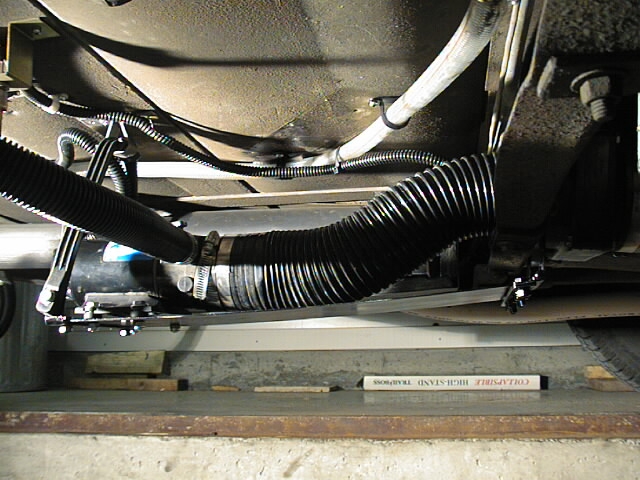
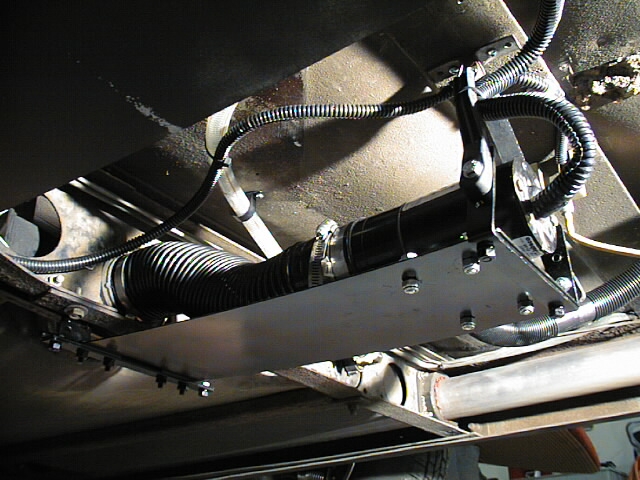
May 30,1999: Redoing the Macerator installation. The initial installation left about 5 gallons of waste that could not be pumped out due to the location of the pump inlet being too high. Hence... a redo. The pump is now closer to the holding tank itself, approximately inches of flexible 3" hose is used. I built a platform with a base slightly lower than the bottom of the holding tank.
The base was lined up with the lowest points of the coach and mounted with hinges using the bolts at the gatevalve frame points. The reason for hinging it is to be able to lower the rear of the platform and thereby also lower the inlet of the pump should it become necessary.
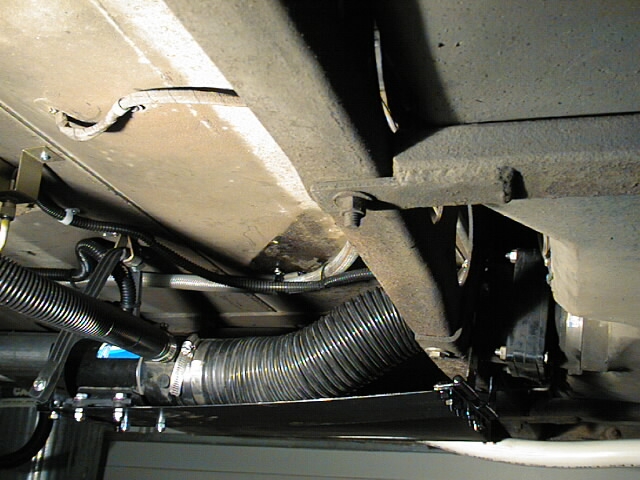
A bungee/bracket is used to hold the rear of the pump platform. The bungee is used so that should a solid object be encountered the base and pump will simply slide over it. Of course if I'm backing up at the time I'm in trouble :-)
I'm hoping that it will not be necessary to raise the platform as in this position it should evacuate nearly all the waste, certainly more than previously.
I used two doorhinges obtained at Home Depot as the dropdown-hinge part and bolted a steel sheet 6x20 to it using flat aluminum as stiffener.
Guess I'll find out next trip if it was worth all the effort. I also reinstalled the macerator oulet hose storage pipe. It was removed during the GenSet install.
In case you're wondering why I went to a macerator in the first place... I simply didn't like the mess and storage problem associated with the 3" gravity drain and it seemed that one could never quite carry enough length of hose in the 4 foot storage pod and when I did carry extra it just added to the overall mess. Here is a summary of how my setup now works: Pump outlet has a 15 foot hose connected full time and stored in a pod made from a 10 foot 1 1/2" plastic pipe that runs fore and aft underneath the coach. The on-off switch is mounted so that the generator door has to be open. This acts as a safety to assure that the macerator cannot be left on accidentally. To dump: 1) pull up alongside a dumpstation... leeway makes it easy as the hose will reach even of parked off a little. 2) unlatch generator door and open gatevalve. 3) pull out the outlet hose from it's storage pod and secure to dump inlet. 4) pull switch to turn on the pump. To flush I have a permanently mounted fitting with a quick disconnect easily accessable. Of course the pump could fail, but so could many other things on the good 'ol GMC. Matter of fact not only on the GMC :-)
This page was last updated
|